
A Switchboard is the principal window for displaying your railway. You may elect to have several switchboards, or one switchboard, depending on size of railway & screen size available. (TC Bronze only allows one switchboard). The switchboard size, once drawn, is fixed: so plan it carefully!
My Switchboard (it's too large to show on screen)
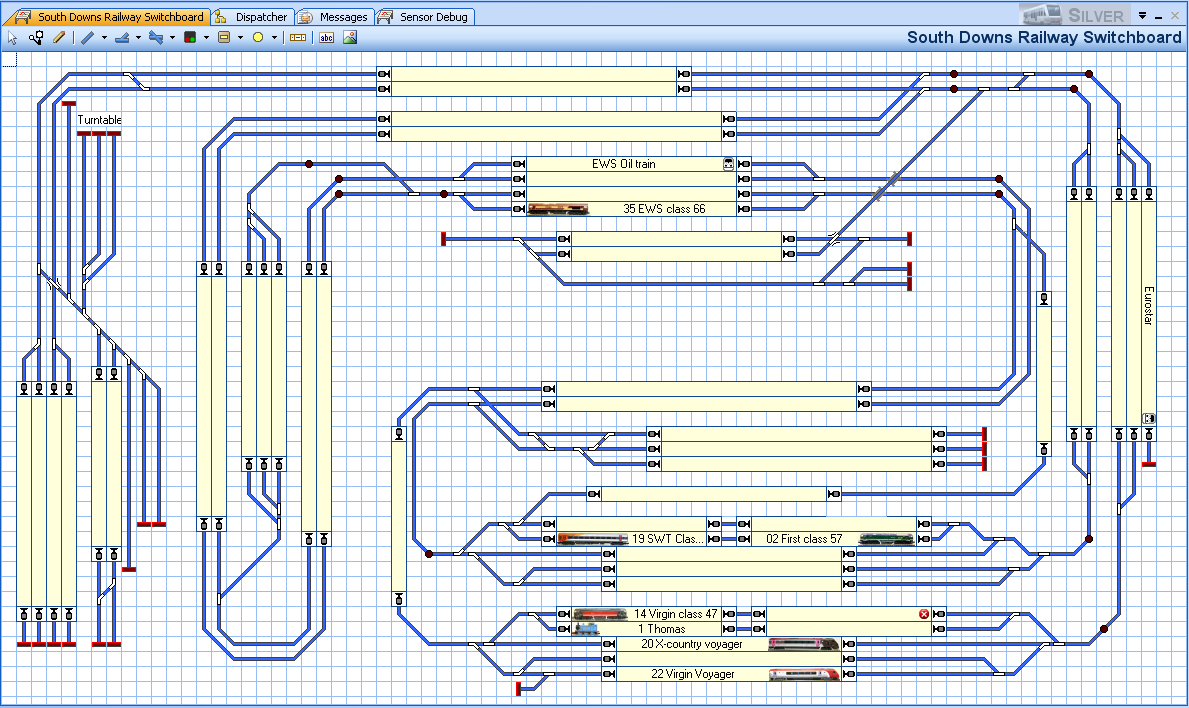
Because the switchboard can't be zoomed, plan how you will use your screen space. I typically want the switchboard and the engines/trains window visible at once. Use that knowledge to work out how big you can make it.
Start by positioning the points, then the track in between them. This will give you a schematic indication of the basic railway. Set the properties for each point to assign the DCC accessory decoder number for each point, and which direction is closed/thrown. Then test it all, thoroughly!
Add the blocks to the switchboard. Blocks are needed anywhere one train might stop under automatic control; typically you would expect a signal to be at the end of each. Station platforms, roads in a goods yard and roads in fiddle yards would be blocks. Roads in a goods yard where you will be shunting do not need to include blocks. The blocks will show the train name in them, so make them big enough. 15 squares seems to be a good size. Each block will need a name, so try to use a meaningful scheme (for example being logical about platform numbers).
Use the Block Editor tab to add the contact indicators to each block. These are some kind of track sensor used to detect train presence; mine are all electrical detection. A typical block on my railway can only have trains running in one direction, so it needs two contact indicators:
- One to indicate that the block is occupied, which will be used to commence slowing a train down if it is to stop;
- One to indicate that the stop point has been reached.
Then while still in the block editor, add brake markers and stop markers. These are attached to the contact indicators and tell Traincontroller what action to take when the contact indicators become active. They are directional: my blocks only have them pointing one way or the other, but if you have bidirectional blocks you will have two sets. The Brake Marker will have a "ramp" distance which is the length on the model over which the train is to decelerate to its threshold speed if it is going to stop.
If the block is long, and you want engines only to start to slow down part way along the block, you can add an offset distance. This lets the train run at full speed until it has covered that distance. Your trains will need to have good speed profiles for that to work accurately!
It is possible to add signals and graphics to the switchboard; I haven't done that.
Unless you have TC bronze, you can have several switchboards.