
We've finished the graveyard for Clanfield Church. The church itself is a Kestrel kit. Cheryl created the grave stones from plasticard, and painted them. They've been weathered with drybrushed grey to add signs of age.

Clanfield station is made from Peco plastic building kits. I used the standard brick type platform units, cut down to a sensible width. The end part joining the platforms was made up from more plastic sections suitably modified. The station building is the Peco country station kit, suitably repainted to make it look more modern. I still need to add a ramp up to the entrance.
This was the first platform I'd made and there are some lessons. There were approx 1mm gaps between platform strips after assembly. I filled the gaps and repainted the platform tops with a spray paint, only to find the gaps changed in width as temparature changes. I hadn't glued the platform tops together; with a solid join that probably wouldn't have happened. To try to get visible mortar, I sprayed the sides grey then drybrushed the brick colour back on. This is OK, but the better method turns out to be to use a white or gray "wash" over the brick colour that you then wipe off before it dries. The idea is that the paint wash is retained in the mortar grooves.
The station building is lit with three surface mount white LEDs. One is under the canopy on the platform; the other two are in the building. All three are in series with a single 1K series resistor which from approx 16v DC gives VERY bright lighting. They are driven by an output from a CML Electronics MSC8 decoder, on DCC address 504.
I've added a fence down the front of the 1st platform, which only has a rail on one side. The fence is 1mm planking, painted white. This marks the boundary of the railway property; the other side will be a field and the churchyard.
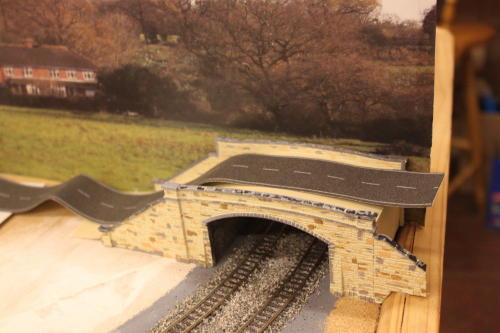
There wasn't originally going to be a road in the Clanfield area until it was pointed out that it would look daft. So we added the bridge at the right hand end, to give access.
The road is the fabric strip supplied by Gaugemaster. It feels like felt on its top surface, and is self adhesive. Apparently it is important not to stretch it: so lay it carefully.
There is a car park area at the end of the village. The tarmac area is made using a Metcalfe "tarmac" sheet of card simply cut to size. The markings were added using a correction pen: this is a pen-like device that applies a bead of white "Tipp ex" type fluid approx 1mm wide. With some practice it is possible to get good lines of constant width. Be careful not to squeeze too hard otherwise it will run.
The pavements are made from Matcalfe card sheets of N scale paving slabs, carefully cut to fit. The walkways to the church are the cobbled parts of the same sheets.
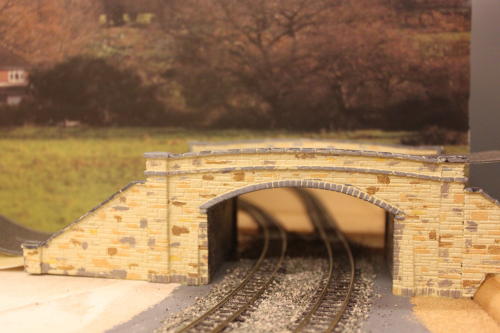
A bridge at the edge of the (flat) world? Wonder where it goes?
The mail line past Clanfield runs through the backscene and into the fiddle yard. I was going to have a tunnel entrance, but a friend suggested a road bridge would be better, both offering some depth and giving somewhere for a road to reach Clanfield from.
Tre bridge has been made up from a pair of Peco tunnel entrances with retaining walls. 1mm plasticard made the road surface; 2mm scale stone embossed Plastikard was used for the inside walls. The tunnel entrances aren't designed to be seen from the back, and don't model the roadway side of the stone; more Plastikard filled in those gaps. The whole has been painted a sort of Cotswold stone colour, with some stones picked out in different colours.
The bridge is at the right hand end of the backscene, so in any photographs it will be the end of the modelled world. Looks OK to me!
OK, I know, all track and electronics and no scenery.... but that's what I know how to do. But my wife has spoken and scenery there is to be...
So i will need buildings. I haven't planned a major location that will need many of them; the space is taken up by trains. In the Clanfield village area there's room for a station building and then low relief buildings on the backscene.
Enter the Metcalfe cardboard kits. There is a set of lof relief terraced houses, and terraced shops. Both are availalbe in stone or brick: I've used brick. The detail has to be seen to be believed: there are a lot of parts offering curtains, various colour doors and interiors allowing you to make a row of houses that are all different. There are options for dormer windows and bay windows. The former are particularly relevant to Clanfield as half the houses have loft conversions in the real village.
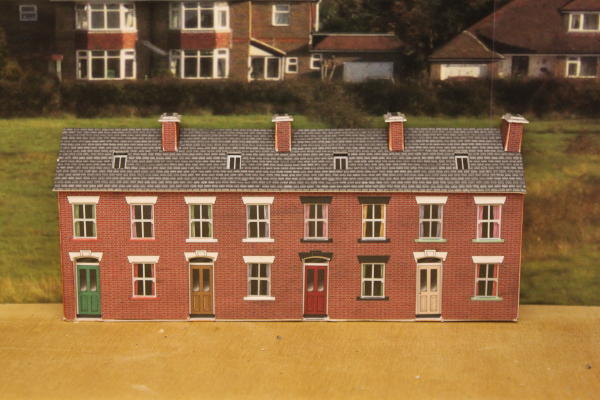
I will be lighting the insides of these, with white LED lights turned on and off by the CML Electronics MSC8 "Scenery animator". This turns the lights on an off periodically on a randomised sequence, so the houses will look occupied. The white LEDs I have need a 2K2 series resistor when driven at 12v to give a quite bright enough light.
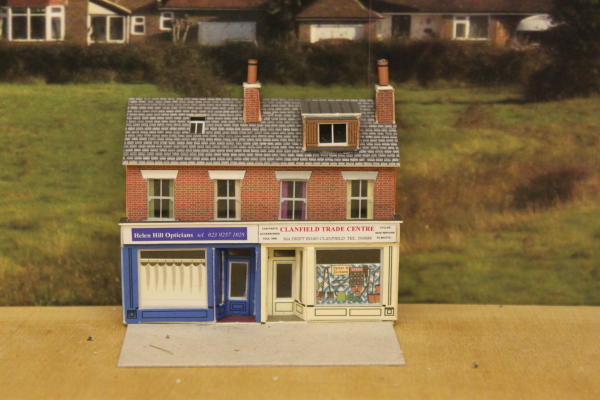
To make the shops a little more interesting, I made up shop fronts that match real businesses in our village. these are simply printed onto photo paper using an inkjet printer. I used "Visio" to design them but an image editor or even a word processing programme could be used.
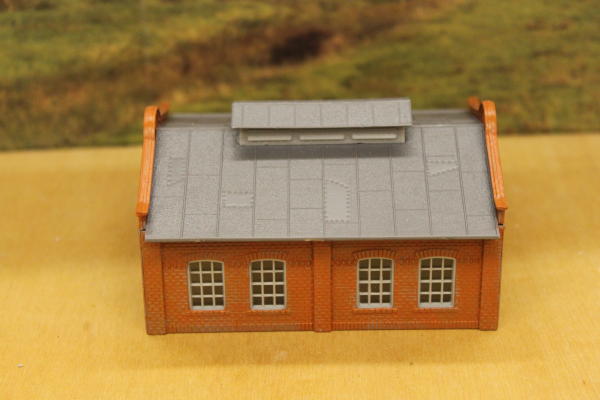
Further down the road there will be a factory, for which I have a Faller plastic kit. I've made up the two smaller buildings: see one of them below. To try to get more realistic brickwork I've sprayed it with grey primer and them drybrushed the brickwork with acrylic paint. You can see some kind of evidence of the brick courses in the result below. Apparently another method to achieve the same is to paint uniformly with a brick colour, then "wash" a well diluted white on then blot most of it off. not tried that yet.
These will again be lit, and the factory has a fire. The MSC8 will control that too: the smoke generator will come on for maybe 1 minute every 5, and the flickering fire will be simulated with red LEDs. The fire engine lights can be driven too.