This uses a Digitrax DN163K0B "plug and play" decoder. This installed fairly easily: it is in the form of a PCB to replace the one supplied by Kato. Be careful with the phosphor bronze pickup strips: these can easily get bent, and no longer make contact with the bogie pickups. To get them to work reliably, they need to be bent in a way that seems counter-intuitive; the body affects their shape too.
The cab lights needed to be changed: the while LED supplied is in the rear (red) light position. The PCB has pads for a front light, but the leads need to be extended. It can be done, though!
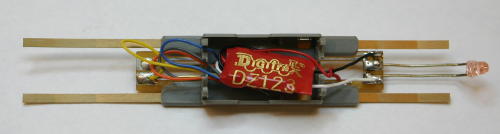
The trailer cab could be modified with the same P&P decoder, but I used a more conventional DZ123 as there is a lot of space available.
The chassis with the plastic shell removed (Use a fingernail to unlatch the tiny clips at the bottom edges, then it simply lifts off). The motor assembly simply lifts out: the driveshafts to the bogies are a push fit into the flywheels. (Getting them back in is fiddly, but that's all).
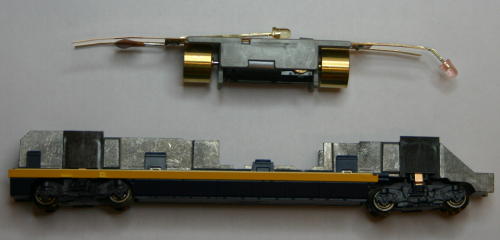
The decoder replaces the PCB mounted above the motor; no wiring or drilling involved. But take care of those long phosphor bronze strips!
This is the PCB from the trailer cab. The space where the motor would go is free, allowing a decoder easily to fit. A 2 function lighting decoder would do, but I didn't have one!